Checklists
Checklists serve as a reliable anchor for new users during onboarding. If they exit the onboarding guide, they can always return or explore other tours through the checklist. Providing a sense of progress not only keeps users engaged but also fosters a sense of achievement, encouraging deeper interaction with your product.
How to build checklists
You can create checklists from the Checklists page in the sidebar. They function similarly to regular flows, supporting auto-start conditions and publication. Once set up, they seamlessly appear in your app via Usertour.js without requiring additional installation.
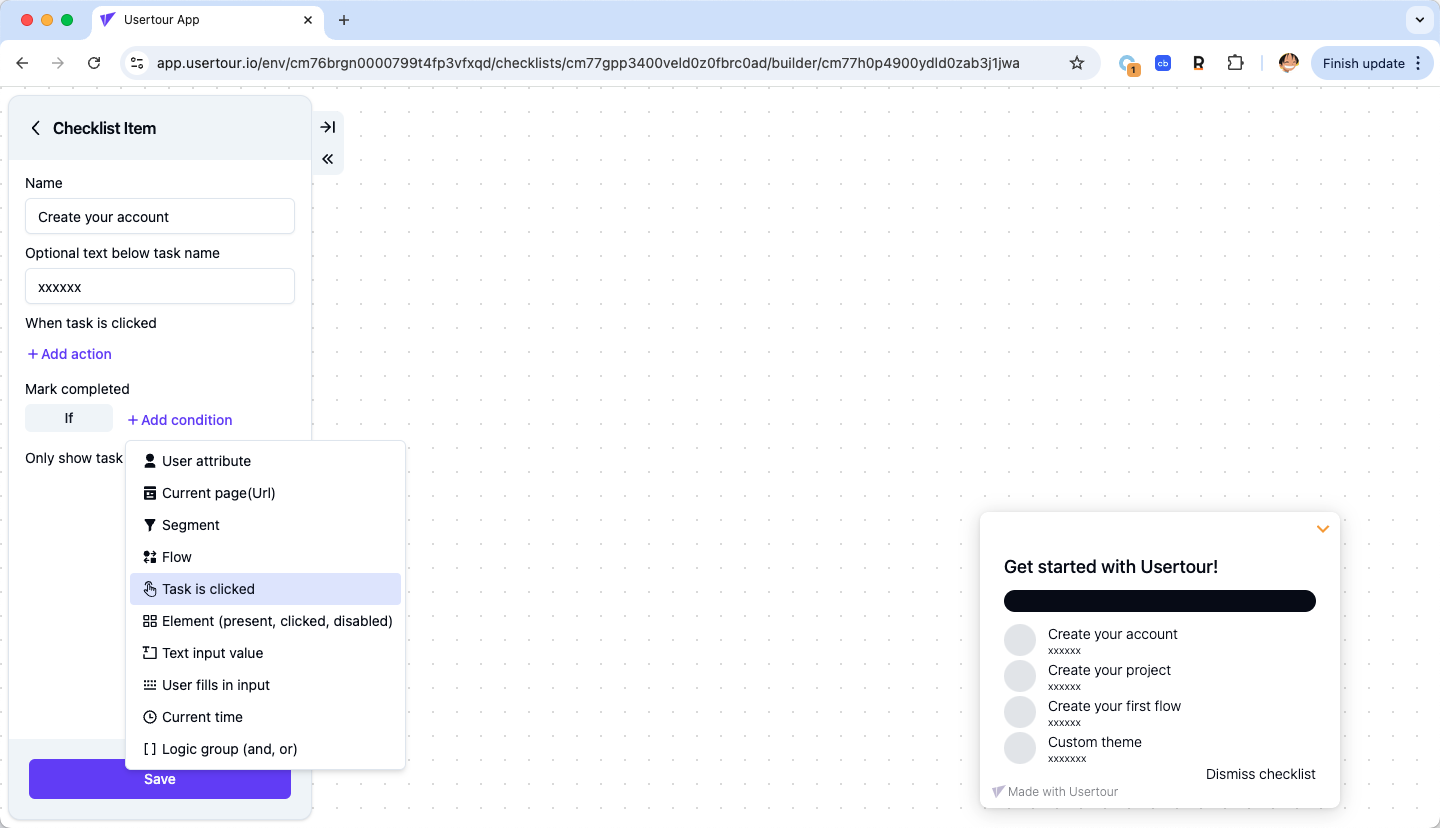
You can add unlimited tasks to your checklist. Each task includes a name, an optional subtitle, a completion condition, and one or more actions. For example, a completion condition might be when users create their first project, and the action could be triggering a tour to guide them through the process.
What users see
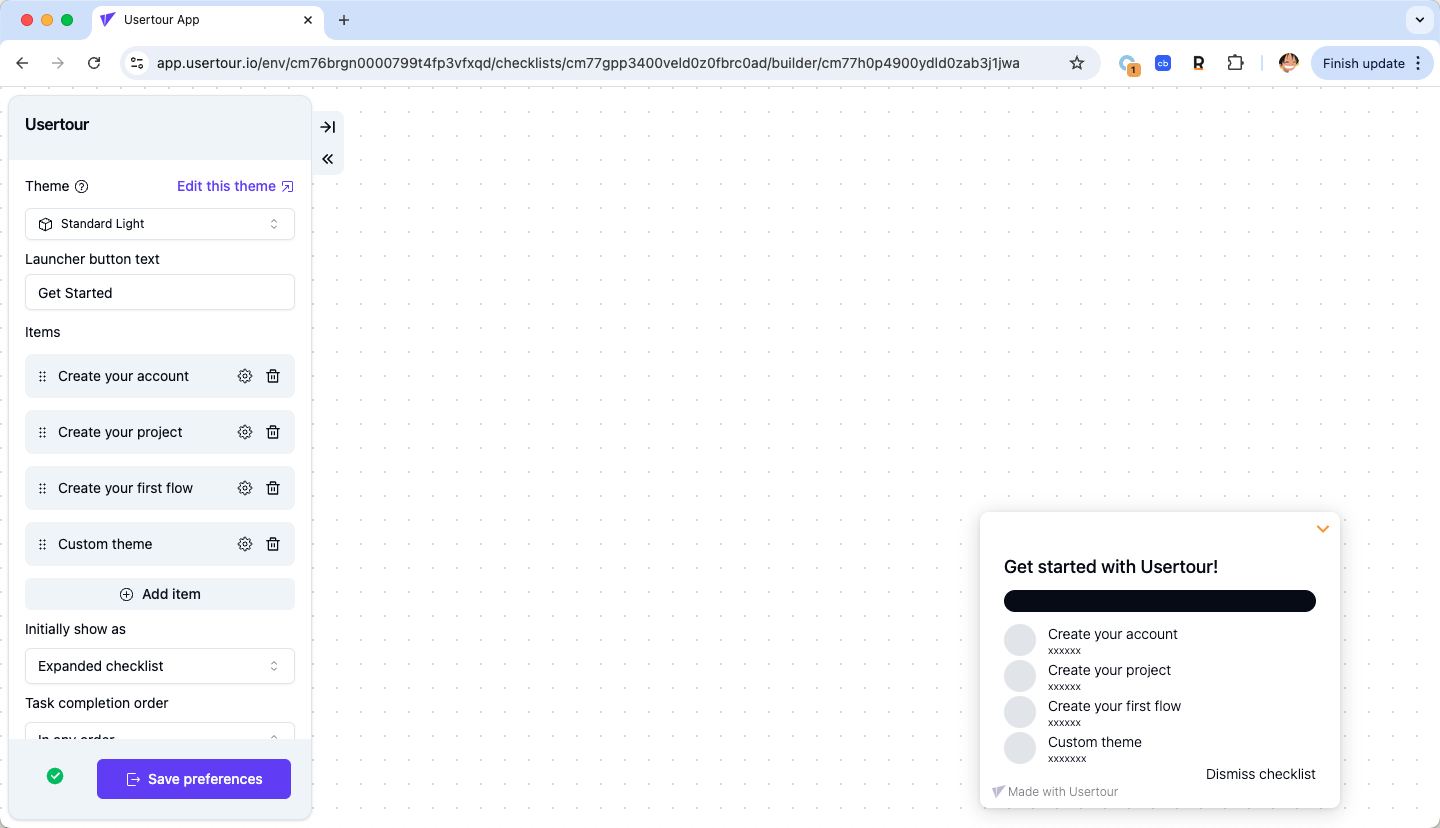
When a checklist is triggered for a user, it will appear in the lower-right corner of the screen by default.
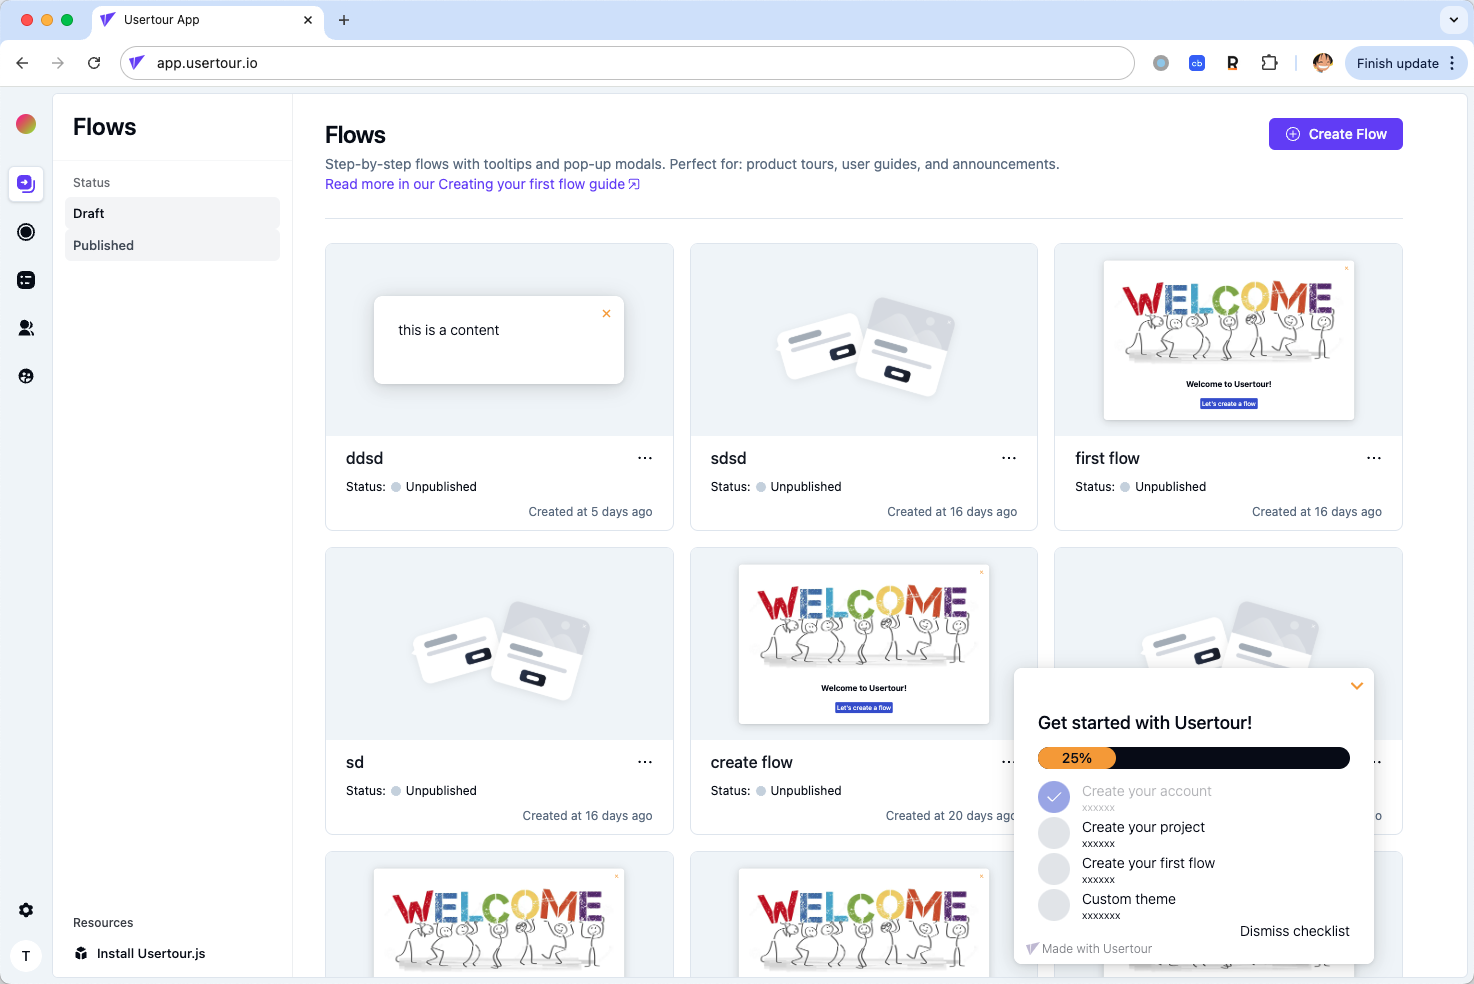
When a task is clicked, its associated actions—such as starting a flow or navigating to a page—are triggered. If the user minimizes the checklist, a launcher button labeled “Get started” appears in the same corner, displaying a number that indicates the remaining tasks.
As users complete tasks, the checklist is automatically displayed with a checkmark animation, and the progress bar at the top updates in real-time to reflect their progress.
Completing a checklist task based on flow completion
To mark checklist tasks as completed when users have viewed or finished a flow, you can set the following condition:
Customizing the look and feel of your checklist
Similar to other UserTour content, you can customize the appearance and position of your Checklist and Checklist Launchers using the theme editor (Settings -> Themes).
Dismissing a checklist
Users can dismiss a checklist by clicking the "Dismiss checklist" button at the bottom. To prevent users from dismissing the checklist, simply toggle the "Prevent users from dismissing checklist" option found in the advanced settings (below the auto-start conditions).
Conditionally hiding the checklist and launcher.
Once a checklist, including the checklist launcher, is started, it remains visible until the user dismisses it or it’s hidden with temporary hide conditions. To hide an active checklist on a specific page or in certain scenarios, you need to add a temporary hide condition.
If the checklist is embedded in a resource center and you are conditionally hiding the resource center and its launcher, you can also hide the embedded checklist with temporary hide conditions. Despite being embedded, the checklist and resource center are separate content types.
If you don’t want to start a checklist for a user at all, avoid using temporary hide conditions. Instead, simply exclude them from the auto-start conditions.
